Top 7 Effective Hip Bursitis Massage Techniques for Quick Relief
Understanding Hip Bursitis and the Role of Massage
You’re here because you’re grappling with the persistent ache of hip bursitis, and you’re seeking effective ways to find relief. Hip bursitis, specifically trochanteric bursitis, occurs when the bursa – a small, fluid-filled sac that cushions the bone, muscle, and tendons near your hip joint – becomes inflamed. This inflammation often leads to pain on the outside of your hip, which can worsen with activity, walking, or lying on the affected side. While rest, ice, and anti-inflammatory medications are common first-line treatments, massage therapy can play a crucial role in alleviating symptoms by reducing muscle tension, improving circulation, and promoting healing. However, it’s vital to approach massage for hip bursitis with caution and an understanding of the correct techniques to avoid exacerbating the condition. This guide will walk you through seven effective massage techniques designed to provide quick relief, emphasizing safe practices and strategies informed by the latest understanding of this condition. Remember, always consult with a healthcare professional or a qualified massage therapist before starting any new treatment, especially if your pain is severe or persistent. They can accurately diagnose your condition and ensure these techniques are appropriate for your specific situation.
The Mechanics of Hip Bursitis Pain
To effectively address your hip bursitis, it helps to understand why it hurts. The greater trochanteric bursa is located on the outer part of your femur (thigh bone), at the bony prominence you can feel on the side of your hip. Overlying this bursa are several muscles and tendons, including the gluteus medius, gluteus minimus, and the iliotibial band (IT band). When these muscles or tendons are tight, they can rub against the bursa, causing irritation and inflammation. Repetitive motions, direct trauma, prolonged pressure, or even poor posture can contribute to this irritation. The resulting inflammation leads to swelling and pain, making simple movements like walking, climbing stairs, or even sleeping on your side incredibly uncomfortable. The pain can sometimes radiate down your thigh, mimicking other conditions like sciatica, making accurate diagnosis essential. Massage, when applied correctly, aims to reduce the tension in these surrounding muscles and tissues, thereby decreasing the pressure on the inflamed bursa and facilitating its healing process. However, the key is to avoid direct, aggressive pressure on the bursa itself, especially during acute flare-ups, as this can worsen your symptoms.
Why Massage Can Be Your Ally (When Done Right)
You might be wondering how massage, which involves applying pressure, can help an inflamed area. The secret lies in indirect application and gentle techniques. When performed correctly, massage for hip bursitis isn’t about “squishing” the bursa. Instead, it focuses on the muscles and fascia (the connective tissue surrounding muscles) that contribute to the tension and irritation around the hip joint. By releasing tightness in these surrounding structures, you can reduce the compressive forces acting on the bursa. This, in turn, can decrease inflammation and pain. Furthermore, massage can improve local blood circulation, bringing fresh oxygen and nutrients to the affected area while helping to flush away metabolic waste products that contribute to inflammation. The psychological benefits of touch and relaxation also shouldn’t be underestimated; reducing stress and muscle guarding can significantly contribute to pain management and overall well-being. The techniques outlined here are specifically chosen to address the contributing factors of hip bursitis without aggravating the inflamed bursa, offering you a path towards relief.
If you’re seeking relief from bursitis in the hip, you might find it beneficial to explore various treatment options, including massage therapy. For a deeper understanding of how different health conditions can impact your overall well-being, you can read a related article on hypertension and its implications at this link. This article provides insights that may help you consider the broader context of managing pain and inflammation in your body.
Preparing for Your Self-Massage Session
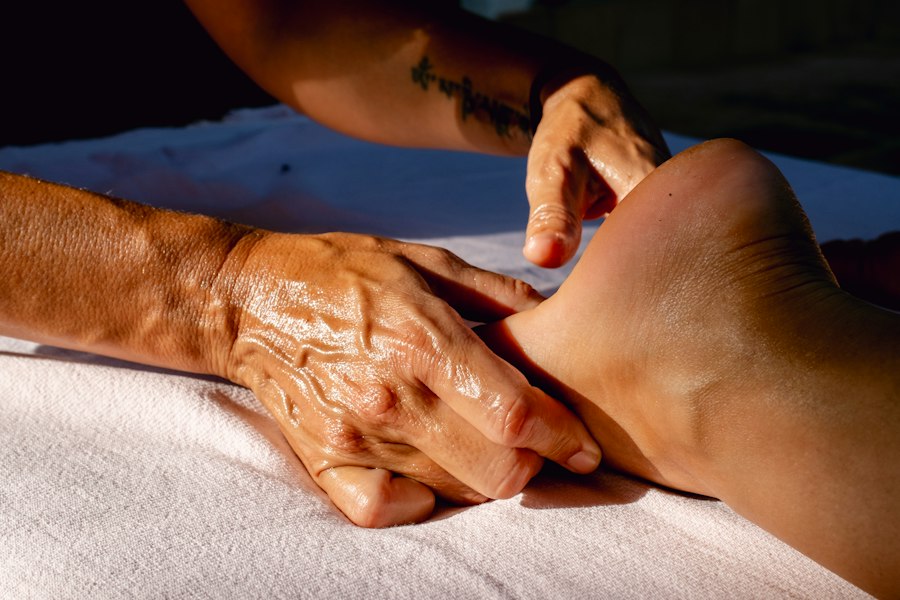
Before you dive into the massage techniques, proper preparation is key to ensuring a safe and effective session. Taking a few minutes to set the stage can make a significant difference in your comfort and the overall outcome. Your primary goal is to relax your body and mind, making your muscles more receptive to the massage. Remember, if at any point you feel sharp pain, stop immediately. Your body is giving you important feedback, and pushing through pain can do more harm than good, especially with an inflamed bursa.
Creating a Comfortable Environment
You want to create a space that promotes relaxation and allows you to focus solely on your body. Find a quiet spot where you won’t be disturbed. You might consider lying on a yoga mat on the floor or on a firm bed, depending on the technique. Ensure you have enough space to move freely, especially if you’ll be using a foam roller or other tools. Soft lighting, calming music, or even aromatherapy can enhance your relaxation experience. The more at ease you feel, the more effective your massage will be, as muscle tension is often exacerbated by stress.
Essential Tools and Lubricants
While some techniques can be performed with just your hands, having a few tools can greatly enhance your self-massage experience and allow for deeper, more sustained pressure where needed.
- Foam Roller: An essential tool for outer-thigh and IT band work. Opt for a medium-density roller to start.
- Massage Ball (Tennis ball or Lacrosse ball): Useful for targeting smaller, tighter areas like the gluteal muscles.
- Massage Oil or Lotion: This is crucial for reducing friction and allowing your hands or tools to glide smoothly over your skin. Choose a hypoallergenic, non-irritating product. A good quality unscented lotion or an oil like almond, jojoba, or coconut oil works well. Apply a generous amount to the area you’ll be working on to prevent skin irritation and ensure a fluid movement during the massage.
Mindful Approach and Low Intensity
One of the most critical aspects of preparing for massage for hip bursitis is adopting a mindful, low-intensity approach, especially if you’re experiencing an acute flare-up. Recent guidance strongly recommends starting with low pressure for 10-15 minutes total, especially during the first week. You are aiming for gentle tissue release, not deep tissue work that directly presses on the bursa. Think of it as coaxing your muscles to relax, rather than forcing them. Continuously monitor your pain levels. A dull ache or a sensation of release is generally acceptable, but any sharp, stabbing, or increasing pain is a clear signal to stop or significantly reduce the pressure. Your goal is relief, not further irritation. Start light, listen to your body, and gradually increase intensity only if your body responds positively.
1. Broad Myofascial Work for Initial Release
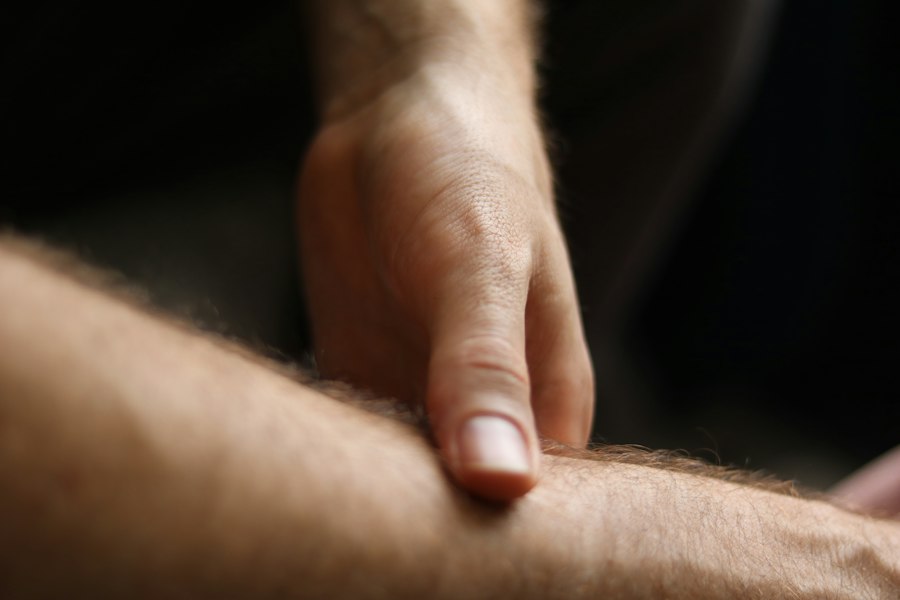
You need to begin your massage session with broad, sustained pressure over the lateral hip and thigh. This initial step is paramount because its primary goal is to reduce muscle guarding and improve tissue glide without directly pressing on the bursa. Imagine you’re gently spreading butter over a large surface rather than trying to poke a specific spot. This approach helps to warm up the tissues, improve circulation, and prepare the deeper layers for more targeted work. It’s an essential first step to prevent further irritation and set the stage for effective relief.
Why Broad Myofascial Release is Key
When your hip bursa is inflamed, the surrounding muscles often tighten up as a protective mechanism. This “guarding” can actually exacerbate your pain by increasing the pressure on the bursa and restricting movement. Broad myofascial work helps to gently release this superficial tension in the fascia and muscles. By applying sustained, wide-area pressure, you encourage the connective tissues to soften and become more pliable. This improves the overall “glide” of the tissues, meaning the skin, fascia, and muscles can move more freely over one another and over the underlying structures. This enhanced mobility can significantly reduce the mechanical stress on the hip joint and, importantly, on the inflamed bursa, without directly impacting it.
Technique for Broad Myofascial Work
- Positioning: Lie on your side, with the affected hip facing upwards. You can support your head with a pillow for comfort. Alternatively, you can perform this standing, leaning against a wall, or sitting, but lying down generally allows for better relaxation and access.
- Hand Placement: Use the heel of your hand or your forearm. Place it flat against the outer aspect of your hip, starting just above the greater trochanter (the bony prominence on your outer thigh) and extending downwards towards your outer thigh. Avoid direct pressure on the greater trochanter itself.
- Pressure Application: Apply a light to moderate, sustained pressure. This isn’t about deep digging. You want to feel a gentle stretch or release in the tissues, not pain. The pressure should be broad, covering a large area.
- Movement: Slowly and deliberately move your hand or forearm in long, gliding strokes down the outer thigh, from just below the hip bone towards your knee. You can also make broad circular motions. The key is slow, sustained movement, allowing the tissues to respond.
- Duration: Continue this broad work for 3-5 minutes, focusing on relaxing into the pressure. If you encounter a particularly tight spot, you can hold sustained pressure there for 30-60 seconds, allowing the tissue to release gradually, but again, avoid direct pressure on the greater trochanter.
Remember, the goal here is a gentle, widespread release. You’re preparing the area, not aggressively attacking specific knots. Think of it as a warm-up for your tissues, inviting them to relax and let go of their protective tension. This foundational step is crucial for making the subsequent, more targeted techniques more effective and less irritating to your sensitive hip.
2. Strategic Gluteus Maximus Massage (Away from the Hip Bone)
Once you’ve performed the broad myofascial work, your next focus should be on the gluteus maximus. This large, powerful muscle forms the bulk of your buttock and plays a significant role in hip extension and rotation. Tension in the gluteus maximus can contribute to imbalances and altered mechanics around the hip, indirectly impacting the bursa. The crucial point here, based on recent guidance, is to focus on the muscle belly of the buttock for a few minutes, specifically staying away from the insertion point near the hip bone. This ensures you’re addressing muscle tension without aggravating the already sensitive area around the greater trochanter.
Why Targeting the Gluteus Maximus is Important
The gluteus maximus is often tight in individuals with hip issues, including bursitis. Its tightness can alter the alignment and movement of the hip joint, potentially increasing friction or stress on the bursa and surrounding structures. By effectively massaging the main body of this muscle, you can release significant tension, which in turn can reduce the overall strain on the hip complex. This can improve your hip’s range of motion, decrease compensatory movements that might exacerbate bursitis, and indirectly alleviate pressure on the inflamed bursa by restoring more optimal muscle balance. Focusing on the muscle belly allows you to access and release these large muscle fibers without risking direct pressure on the bony prominence of the greater trochanter or the bursa itself.
Technique for Gluteus Maximus Massage
- Positioning: You can perform this technique lying on your back with your knees bent and feet flat on the floor, allowing for easy access to your glutes. Alternatively, sitting on a firm chair can also work, leaning slightly forward to expose the gluteal area.
- Hand Placement: Use the heel of your hand, your knuckles, or a massage ball (like a tennis ball or lacrosse ball). If using your hands, place them firmly on the main, fleshy part of your buttock, well away from the side of your hip bone.
- Pressure Application: Apply moderate, sustained pressure. You should feel a deep, comforting pressure, perhaps a “good ache” if you hit a tight spot, but never sharp or increasing pain.
- Movement (Manual): If using your hands, perform slow, deep circular motions or long strokes across the muscle fibers. You can also use gentle kneading movements, picking up and rolling the muscle tissue between your fingers and thumb (if possible).
- Movement (Massage Ball): If using a massage ball, place it under your gluteus maximus. Slowly roll your body slightly from side to side or up and down to allow the ball to work into the muscle. When you find a particularly tight spot (a “trigger point”), you can hold sustained pressure on it for 30-60 seconds, allowing the muscle to release. Remember to breathe deeply throughout.
- Duration: Spend about 2-3 minutes focusing on each gluteus maximus, gradually exploring the muscle belly for tight areas.
The key to this technique is to be deliberate and mindful of your body’s response. You are seeking to release the bulk of the gluteal muscle, which often holds a lot of tension, thereby providing indirect relief to your hip. By staying clear of the hip bone and focusing on the muscle belly, you ensure a therapeutic effect without irritating the sensitive bursa.
If you’re dealing with bursitis in the hip, exploring various treatment options can be beneficial, and massage therapy is often recommended for relief. A related article discusses the advantages of massage in alleviating pain and improving mobility for those suffering from this condition. For more insights on how massage can aid in your recovery, you can read the full article here. This resource provides valuable information on how targeted techniques can help reduce inflammation and promote healing in the affected area.
3. Targeted Gluteus Medius Massage (Above the Trochanter)
| Metric | Description | Typical Values/Notes |
|---|---|---|
| Massage Type | Recommended massage techniques for hip bursitis relief | Deep tissue, myofascial release, trigger point therapy |
| Session Duration | Length of each massage session | 20 to 45 minutes |
| Frequency | How often massage should be performed | 2 to 3 times per week initially, then as needed |
| Pressure Level | Intensity of massage pressure applied | Moderate to firm, avoiding excessive pain |
| Effectiveness | Reported pain reduction after massage therapy | 30% to 60% improvement in pain and mobility |
| Precautions | Important considerations before massage | Avoid massage during acute inflammation or infection |
| Additional Therapies | Other treatments combined with massage | Physical therapy, ice application, anti-inflammatory medication |
Following the broader work on the gluteus maximus, your next target is the gluteus medius. This muscle is located higher up on your outer pelvis, sitting above and slightly behind the greater trochanter. It’s a critical hip abductor and stabilizer, and when it becomes tight, it can significantly contribute to lateral hip tension, directly impacting the mechanics around the bursa. The goal here is to target the upper outer pelvis above the trochanter with moderate, controlled pressure, specifically to reduce this lateral hip tension. This approach directly addresses one of the primary muscular culprits in hip bursitis without risking direct pressure on the bursa itself.
Why the Gluteus Medius Needs Your Attention
The gluteus medius works tirelessly to stabilize your pelvis when you walk, run, or stand on one leg. If this muscle is weak or overly tight, it can lead to inefficient hip mechanics and increased strain on the structures around the greater trochanter, including the bursa. Its proximity to the bursa means that tension here can directly pull on the surrounding tissues, contributing to inflammation. By specifically releasing tension in the gluteus medius, you can alleviate some of the compressive forces acting on the lateral hip, improve hip stability, and promote a more balanced movement pattern. This targeted release is often a game-changer for individuals experiencing lateral hip pain.
Technique for Gluteus Medius Massage
- Positioning: Lie on your side with the affected hip facing upwards. You can slightly bend your knees for comfort and stability. This position allows excellent access to the gluteus medius.
- Locating the Muscle: To find your gluteus medius, feel for the bony prominence of your greater trochanter on the side of your hip. The gluteus medius is located directly above this, on the upper outer part of your pelvis. It often feels denser or more ropey when tight.
- Hand Placement (Manual): Use your fingertips or knuckles. Place them firmly on the gluteus medius, applying pressure directly above the greater trochanter. Ensure you are not pressing down on the greater trochanter itself, but rather on the muscle belly situated above it.
- Pressure Application: Apply moderate, controlled pressure. You want to feel a distinct sensation of release or a “good ache” as you work into the muscle. Avoid anything sharp or burning. This is where sustained, intentional pressure makes a difference.
- Movement (Manual): Perform small, slow circular motions or short, deep strokes across the muscle fibers. You can also use sustained pressure on particularly tight spots for 30-60 seconds, allowing the muscle to gradually soften and release.
- Movement (Massage Ball): A massage ball can be highly effective here. Lie on your side and place the ball under your gluteus medius. Slowly roll your body slightly to find the tightest spots. Once found, gently lean into the ball, allowing its pressure to work deeply into the muscle. Again, sustain pressure on tight points.
- Duration: Spend 2-3 minutes working on your gluteus medius. Be patient and allow the muscle to respond to the pressure.
As you perform this technique, pay close attention to the sensations. You’re aiming for a sense of release and reduced tension in your outer hip. This focused work on the gluteus medius can significantly diminish the lateral hip pain associated with bursitis by addressing a key muscular contributor.
4. Releasing Tension in the Tensor Fasciae Latae (TFL)
Moving around to the outer-front aspect of your hip, you’ll now focus on the tensor fasciae latae, or TFL. This small but powerful muscle is often overlooked but plays a crucial role in hip stability and motion. It originates from the front of your iliac crest (hip bone) and runs down the side of your thigh, blending into the iliotibial band (IT band). Tightness in the TFL can significantly contribute to overall lateral hip tension and is directly linked with hip pain, including that associated with bursitis, due to its influence on IT band tension. Therefore, massaging the outer-front hip area to ease TFL and subsequently IT band tension is a vital step in your relief strategy.
The TFL’s Connection to Hip Pain and Bursitis
The TFL acts as a hip flexor, abductor, and internal rotator. When it becomes tight or overactive, it can pull on the IT band, increasing tension along the entire outer thigh. This increased tension can directly rub against the greater trochanteric bursa, aggravating its inflammation. Think of the IT band as a very strong, fibrous rope running down your thigh; if the TFL is pulling on one end of that rope, the tension will be felt all the way down. Releasing the TFL helps to loosen this “rope,” thereby reducing the friction and pressure on the bursa. Addressing the TFL is often a missing link in resolving persistent lateral hip pain and is an indirect but powerful way to provide relief from bursitis.
Technique for Tensor Fasciae Latae (TFL) Work
- Positioning: Lie on your side with the affected hip facing upwards. You can slightly bend your knees and keep your top leg slightly in front of the bottom leg to help expose the TFL area.
- Locating the TFL: To find your TFL, place your hand on the very front, outer part of your hip, just below your anterior superior iliac spine (the bony point at the front of your hip). It’s a relatively small muscle, often feeling firm or tight. You can try slightly lifting your leg out to the side (abducting it) to feel it engage.
- Hand Placement (Manual): Use your fingertips, thumbs, or knuckles. Place them firmly on the muscle belly of the TFL.
- Pressure Application: Apply moderate, sustained pressure. You might feel a dull ache or a sensation of release. Remember the rule: no sharp or increasing pain.
- Movement (Manual): Perform small, slow, circular motions, or short, gentle strokes across the muscle fibers. You can also use sustained pressure on any particularly tight spots you find for 30-60 seconds. Breathe deeply to encourage relaxation.
- Movement (Massage Ball): A massage ball can be quite effective here. Lie on your side and place the ball directly on the TFL. Slowly roll your body slightly to find the tightest areas. Once you locate a tight spot, gently lean into the ball, allowing its pressure to work into the muscle.
- Duration: Focus on the TFL for 1-2 minutes. This muscle can be quite sensitive, so start gently and adjust pressure as needed.
By strategically releasing the tension in your TFL, you are directly addressing a major contributor to IT band tightness and, consequently, lateral hip pain and bursitis. This technique, while targeting a smaller muscle, can yield significant relief by loosening the entire outer hip and thigh complex.
5. Gentle Outer-Thigh / IT Band Rolling for Suppleness
After targeting specific muscles, it’s time to address the broader tension along your outer thigh, particularly involving the iliotibial (IT) band. The IT band is a thick band of fibrous tissue that runs from your hip down to your knee. While you cannot “stretch” the IT band itself (it’s too dense), you can release the tension in the muscles that attach to and influence it, such as the TFL and gluteal muscles. Gentle foam rolling or other rolling therapy on the outer thigh is commonly recommended to reduce muscle tightness and improve blood flow, making this a crucial step for comprehensive hip bursitis relief. The emphasis here is on “gentle” and “rolling around the IT band” rather than directly compressing it, as direct pressure on an inflamed bursa or tight IT band can be counterproductive.
The IT Band’s Role in Hip Bursitis
As mentioned, the IT band can become very tight, especially if the TFL and gluteal muscles are tense. This tightness can increase friction over the greater trochanter, directly irritating the bursa. The IT band does not directly attach to the bursa, but its path and the underlying structures mean that high tension can contribute to compressive forces and mechanical irritation. Gentle rolling techniques aim to improve the pliability of the muscles and fascia around the IT band, which in turn can reduce its overall tension and alleviate pressure on the hip joint and bursa. It also helps to improve blood flow, aiding in the healing process.
Technique for Gentle Outer-Thigh / IT Band Rolling
- Positioning (Foam Roller): Lie on your side with the foam roller positioned under your outer thigh, just below your hip bone. Your bottom leg should be straight, and your top leg can be bent with your foot on the floor in front of you for support. This allows you to control the amount of weight you put on the roller.
- Avoid the Greater Trochanter: Crucially, do not place the foam roller directly on your greater trochanter if your bursa is inflamed. Start rolling from just below this bony prominence. Newer guidance specifically advises working around the bony prominence, not over it, because direct deep compression can worsen pain and swelling in acute bursitis.
- Pressure Application: Begin with very light pressure. You are aiming for a gentle, slow roll. Use your arms and the top leg for support to control how much weight you bear on the roller. You can adjust the pressure by shifting more or less weight onto your hands and supporting leg.
- Movement: Slowly roll the foam roller down your outer thigh towards your knee, and then back up. Focus on the muscles surrounding the IT band. Move very slowly, about an inch per second.
- Targeted Release: If you encounter a particularly tight or sensitive spot in the muscle tissue surrounding the IT band (not directly on the bone or bursa), you can pause on that spot for 20-30 seconds, allowing the tissue to release. Breathe deeply. Remember, pain should be tolerable; if it sharpens, reduce pressure or move to a different spot.
- Duration: Roll for 2-3 minutes on the affected outer thigh.
- Alternative (Massage Ball): If a foam roller is too intense or you want to target smaller areas around the IT band, you can use a massage ball. Lie on your side and place the ball under your outer thigh, carefully avoiding the greater trochanter. Slowly roll your body to move the ball, or apply sustained pressure to tight spots.
By incorporating this gentle outer-thigh and IT band rolling, you are effectively reducing widespread tension that can contribute to your hip bursitis. Remember, the key is gentleness and mindfulness of your body’s response, ensuring you facilitate relief rather than exacerbating discomfort.
6. Avoiding Direct Pressure on the Greater Trochanter
This point is not a massage technique itself, but rather a critical principle that underpins all effective and safe massage for hip bursitis. You must consistently and diligently avoid applying direct deep compression over the greater trochanter, especially if you are experiencing acute bursitis. This is a fundamental shift in understanding compared to older approaches. Newer guidance explicitly states to work around the bony prominence, not over it, because direct deep compression can worsen pain and swelling in acute bursitis. Failing to adhere to this principle can undo any benefits you might gain from the other techniques and potentially intensify your discomfort.
Why Direct Pressure is Detrimental
The greater trochanter is the bony landmark on the side of your hip where the bursa is located. When this bursa is inflamed, it is already swollen, tender, and highly sensitive to pressure. Applying direct, forceful compression directly onto this inflamed sac is like pressing on a bruise – it will inevitably increase pain, further irritate the bursa, and exacerbate the inflammation. This can delay healing, intensify your symptoms, and make future massage attempts more difficult due to increased guarding and fear of pain. Your goal is to alleviate pressure and inflammation, not add to it. The surrounding muscles contribute to the problem, not the bursa itself being a target for direct massage.
How to Ensure You’re Avoiding the Trochanter
- Locate the Bony Landmark: Gently palpate the side of your hip. You will feel a distinct bony protrusion – this is your greater trochanter. Mark its general area in your mind.
- Work Around, Not On: When performing any of the gluteal or TFL massages, ensure your fingers, knuckles, or massage tools are positioned either above, below, or to the front/back of this bony prominence. For example, with gluteus medius massage, your pressure should be above the trochanter. With gluteus maximus, it should be on the muscle belly well behind and above it.
- Foam Rolling Awareness: When foam rolling your outer thigh, always start the roller below the greater trochanter, or position it slightly anterior or posterior to it, ensuring the direct force isn’t compressing the bursa. If you feel any sharp pain or increased sensitivity, you are likely too close or directly on the bursa. Adjust your position immediately.
- Listen to Your Body: This is your most important guide. If you experience any sharp, stinging, or increasing pain during a massage technique, that’s your body telling you to stop or significantly alter your approach. This sensation is a strong indicator that you might be applying pressure directly to the inflamed bursa or irritating surrounding structures.
- Use Broad Pressure Initially: The initial broad myofascial work is excellent for avoiding direct pressure, as it covers a wider area with lighter, sustained force, gently easing tissue tension without focusing on specific points of tenderness.
By consciously adhering to the principle of avoiding direct pressure on the greater trochanter, you transform your massage efforts from potentially harmful to truly therapeutic. This mindful approach ensures that you are consistently working with your body to reduce inflammation and pain, rather than inadvertently aggravating an already sensitive area.
7. Starting with Light-Intensity Self-Massage and Listening to Your Body
The final and arguably most crucial technique is an overarching principle for your entire self-massage journey: start with light intensity, keep your total massage time brief, and always, always listen to your body. One recent guide specifically recommends keeping intensity low during the first week. You are dealing with an inflamed structure, and aggression will only lead to further irritation and delayed healing. This mindful approach ensures safety, promotes gradual healing, and empowers you to respond effectively to your body’s signals.
Why Low Intensity is Non-Negotiable
When you have an inflamed bursa, your tissues are already sensitive and possibly swollen. High-intensity massage, often mistaken for “getting deep,” can easily overwhelm these tissues. It can lead to:
- Increased Inflammation: Aggressive pressure can trigger a further inflammatory response, making your pain worse and prolonging recovery.
- Muscle Guarding: If massage is too painful, your muscles will tense up in response, counteracting any relaxation benefits you’re trying to achieve.
- Tissue Damage: While less common with self-massage, excessive force can theoretically cause micro-trauma to already compromised tissues.
Starting with low intensity allows your body to gradually adapt to the massage, encourages muscle relaxation without triggering a protective response, and gently improves circulation. It’s about coaxing your body into healing, not forcing it.
Practical Application of Light-Intensity Self-Massage
- Start Gentle: For every technique, begin with the lightest possible pressure. Think of it as merely resting your hand or tool on the skin initially, then gradually applying just enough pressure to feel a gentle stretch or dull ache, never sharp pain.
- Total Time Commitment: For your entire self-massage routine, aim for 10-15 minutes total, especially during the first week or if you are in an acute flare-up. You don’t need to spend excessive amounts of time on each area. Brief, focused sessions are more effective than prolonged, intense ones that might cause irritation.
- Frequency: Initially, you might do a short session once or twice a day, depending on your response. If you notice increased soreness the next day, you’ve likely done too much. Reduce the intensity or frequency.
- The “Stop If Pain Sharpens” Rule: This is your golden rule. If at any point during your massage, the pain shifts from a dull ache to a sharp, stabbing, or increasing intensity, stop immediately. This is your body’s clear signal that you are either pressing on the inflamed bursa, using too much pressure, or aggravating another sensitive structure. Do not try to push through this pain.
- Listen to Your Body’s Feedback: Pay close attention not just during the massage, but also in the hours and days following. Is your pain reduced? Are you feeling looser? Or are you more sore? This feedback is crucial for adjusting your intensity and approach. If you feel worse, scale back significantly. If you feel better, you can cautiously and incrementally increase the duration or pressure in subsequent sessions, always maintaining a low-intensity mindset.
- Deep Breathing: Integrate deep, slow breathing into your massage. This helps to relax your nervous system, reduces muscle tension, and improves oxygen flow to the tissues, enhancing the effectiveness of the massage.
By adopting a light-intensity approach and prioritizing your body’s signals, you empower yourself to safely and effectively use massage as a tool for quick relief from hip bursitis. Remember, consistency with gentle, mindful application is far more beneficial than aggressive, sporadic attempts.